Showing posts with label Crayons. Show all posts
6

Pick & Draw

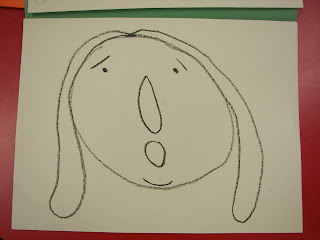
Talk about a great ice breaker! Thanks to Rich Davis creator of Pick & Draw I had a great activity for my new students during their first art class.

Pick & Draw is an awesome game  that is a fun one of a kind  drawing game.  It teaches students how to make crazy and creative cartoon faces. Which was exactly what I needed for my new students.

I didn't know their abilities or even what they had been exposed to from their last art teacher. Which, from what other teachers had told me, was not a lot.  So I decided to use this game not only as an Ice Breaker, but as an assessment pre-test.

Check out Pick & Draw for yourself to see what it's all about.  I used Pick & Draw during 3rd and 4th graders' first day.  It was a great way to end class after going over rules and procedures.

Here are the awesome results.


2

Patterned Shoe Prints

First graders used LINE and PATTERN to create shoe prints.
Students learned the 5 types of LINE by singing our Line song and drawing them in the air. 
Then, we discussed PATTERN by using different materials to make patterns. 
 Each table had different materials to make patterns. It was a great assessment tool.

Next, students worked together to trace their shoes with a black crayon.
Time to draw the LINES. Some students wanted to draw the actual lines that were on their shoes.
Crayons were used to show PATTERN.


Finally, students cut out their shoe prints and glued them to colored construction paper. 
 

3

Art Test

   The end of the year was fast upon us. 1st grade had one more day of art class before the "Good Behavior Art Party" day. Should I have them watch a movie or free draw.... Neither.
   I decided to see what my little 1st graders had learned from the year. In 1st grade we begin to apply the "basics" to projects that reflect around the Elements and Principles. We concentrate on drawing with pencils, coloring like an artist, painting, and collages. So I decided to test them to see how much they had retained. Will they remember to draw lightly? Swish, wipe, and blot? Let's find out...
Students were told that this was a test. I wanted to see if they remembered elements, principles, procedures and processes we had worked on all year in class. 
Create a flower: Any kind. Real or imaginary. 
You have 3 choices of how to make it: Drawing and coloring with crayon, Collage with scissors and glue, or draw and paint. 
All students were given 9"x12" white paper. All materials they needed were out and ready. The rest was up to them. 
Tracing the drawing with a black crayon to make it "POP" when it is painted.

Some students made two types and wanted to turn in the best one. Here you can see paints and crayons out. 

Correct paint procedure setup!

When I asked this student where his sky would stop he said, "All the way to the ground SILLY!"

Me: "Why is this flower so much bigger?"
Student: "It's in the foreground!" 

This student went on to paint the rest of the sky blue and leave the clouds white. It made the cloud shapes more organic. 

One student creating a collage and another one coloring. Notice how her petals are in a stack. She stacked the papers together and cut them all at the same time. "Why did you do that?" I asked. "Because I wanted them all the same." she said. 

Many imaginary color choices!

This little girl pointed out to me that she let one color dry, painted something somewhere else, and then came back to paint beside the first color. She remembered that the colors may bleed together. 

Paint setup for two. You can tell that they did some good blotting on their paper towel.

I was very pleased with all the results. Only 2 students forgot a couple of things. I believe I will now give a test at the end of the year similar to this for all grades. It was a HUGE SUCCESS and the students loved showing me what they learned. One even told me that this should be on the TCAP! 


0

Finished Snow Globes!

For Part 1 Click HERE
Almost finished!
To finish our snow globes we did a fun little "Exercise" review. We jumped into the foreground, jumped into the middle ground, and jumped into the background. I was naming spaces at random and the kids were doing so well jumping into the right places. They really got the concept. We also review what we drew that was in those spaces.


Then, students finished coloring with construction paper crayons. I didn't care what color anything was as long as it was colored! 

Finally, I gave each student a 4 1/2"x 6" rectangle for their snow globe base. We did this step all together by placing the based under the globe till we didn't see top corners. Traced the bottom of the globe onto the base lightly. Remove base and glue "Baby Dots" above the smiley face line. Globe goes back on the base and we are finished. 

0

Simple Kinder Snowman Painting Part 2 along with Snow day updates

After painting our snowmen in Simple Kinder Snowman Painting Part 1, the paint has dried and we are ready to finish up. 
The kinders learned that Construction Paper crayons are special crayons we use for colored papers. Students drew simple details to make their paintings come to life. 


Now for the snow days update:

Tennessee was fortunate to not be hit by the massive snow storm that rocked most of the country this week. But we have had 17 snow days since December. We may actually make it one whole work week. But alas, they are calling for snow mid day tomorrow. :(

We were only allowed 13 snow days. To make up the extra days we are using teacher inservice days, and President's day. Then today, the big decision was made......
We will be going 45 minutes longer for 9 days to make up for each day that is left to be made up... We'll see how this pans out.. I am concerned that I may not be able to have my after school art enrichment program. I'm not sure that parents want to have their kids stay longer after already being at school 45 extra minutes... I am interested in seeing how the school day schedule will be worked out. 

So I will look on the bright side of things, which is that I will be able to complete more projects in this extended time. Maybe even have students keep an art journal which I have never really had the time for. I have to say, I don't think the students will mind the extra ART time :)

Space with Snow Globes Part 1

(project not finished)

To begin this lesson we looked at the art of Georges Seurat 
Sunday Afternoon on the Island of La Grande Jatte
This work gives a wonderful example of Foreground, Middle Ground, and Background
Explain what each word means and then discuss what and who from the art work are in the different Spaces.
Who is in the Foreground? "The lady with the big bottom!"
How do you know she's in the front? "She's big!"
As we continue the discussion we also talk about Small, Medium, and Large.
I then pick a few students to stand in each Space in the room. I move around the room while the standing students stay in place to show how the Space they occupy changes as the viewer moves around the room. 
The students quickly get the point. 

Now for the lesson. 
Space with Snow Globes
Supplies: any color 9"x12" construction paper
   4"x6" brown or tan construction paper for the base of snow globe
   circle template to be traced for globe
   scissors
   glue
   pencils
   black crayons
   construction paper crayons
Begin by having students select their color paper. Trace the circle template for their globe and cut out. Students help each other by one student holding the template and they other tracing and then they switch. Name and Code on the back.

Drawing: I demo each step on the board and the students follow along.
Draw what's in the Foreground first. The snowman sits at the bottom and his head comes to the middle of the globe. I use a lot of shape words to help students draw.

Middle ground Trees: Put finger on the snowman's belly and move to the side. Draw a standing up rectangle for the tree trunk and a triangle for the top of the tree. Do the same for the tree on the other side, but maybe have this tree start to the side of the snowman's neck.

Background mountains: Draw a horizon line to show where the ground stops and the mountains begin. When you draw your line make sure you stop when you hit something, then pick up, and start your line on the other side. Now draw zig-zag lines for the mountains. Show snow on your mountains by adding more zig-zags. 
Students add details and trace drawing with a black crayon. (I left this part out in some classes just to see which I liked better)
Use construction paper crayons to color your globe. 

Stay tuned for the finished project complete with base!
(Whenever I get back to school that is...Snow day #16!)


Back to Top