Showing posts with label 2nd grade. Show all posts

Family Art Night


Last school year I held my first family art night. 
Because we are a Title 1 school we have to hold several parent involvement nights. I was approached by our title 1 staff and was excited to give it a try. Art Night was held on the same night as parent teacher conferences. If you want more people, host these events on a night when most parents will be sure to attend. Another good example would be book fair night. Here are some of my Pinspirations:

January Show
The Set up
I used table cloths from book fair and covered all the cafeteria tables I needed. 
 5 stations with 2 tables for each. I also had many specialist, sped teachers, and assistants help out. I couldn't have done it without them.
 Drawing
 Painting
 Marble painting
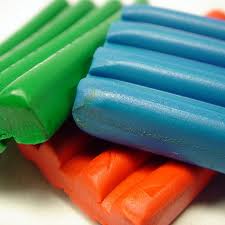
 Pinch pots with model magic
 Stamps
 Printing for stamps
 All materials were purchased with Title funds and not my art funds. This was to make sure we could have more art nights in the future and other teachers could also use the materials for projects in their classes. I used Patty's idea from Deep Space Sparkle to create boards with directions. I used science boards and painters tape to display the directions. The painters tape allows me to easily peal off the directions for future ones. Parent volunteers helped me put these together. 
I never got a chance to take my own photos. These are scanned from our year book.
It was a huge success. Not even the impending ice storm could keep families away!

 Doing what I do best, talking. 
 Marble painting was the most fun station!

Signs were on tables reminding everyone to write their name and child's teacher on the back. They were told to take them home tonight if the papers were dry. I returned all others the next day. 
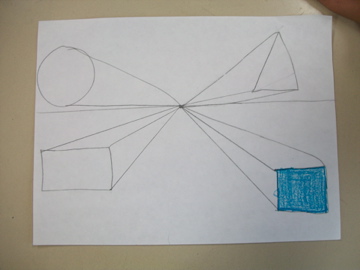
This is a table for Kindergarten work.
Family art night was a lot of work, but a whole lot of fun. It was such a joy seeing families creating art together. There was no fee for admission. 


Good Behavior Art Party / Reward Party


I love to reward my students. I began good behavior art parties my first year of teaching after one of my student teacher placements did them. The parties are not only fun for the kids but they are a part of my behavior management plan.

It all begins with my whole class behavior chart.
With this chart each class had to get 9 green days to earn a party. This made it so classes could only earn 4 parties a year at most. Some classes would only get 2 a year...
This is my new game board chart. At the beginning of class classes start with 3 points. If they get too loud, or whatever else, they lose a point. At the end of class I move their game piece the number of points they have earned. There are 27 spaces. 27/3 is 9 for 9 weeks. Again, classes can earn up to 4 parties a year.

If a class misses a day due to an event or snow day I will automatically give them 3 points for the missed day.


Closer look at the game pieces. I use Post Its brand bookmarks.

FYI students love the game board more than the chart.


PARTY TIME!!
Most of the time I use ART CENTERS. Sound familiar to my faithful followers? Check here if not. 
Good Behavior Art Party centers are a bit different, but the set up and execution are the same. 
I set up 3 centers. I have 6 tables so I set up 2 tables for each center. Students may sit where they want as long as there are still 4 chairs at each table. I explain it to the kids as follows:

"For your Art Party you will be doing three centers. You will be at each center for 10 minutes. When the timer goes off you will clean up your center and sit quietly. Change to the next center when I say "GO". You may begin the next center as soon as you get there. "

Center times will depend on the amount of time you have. Adjust accordingly. 

I like to change my centers up a bit each nine weeks. Here are pics from my first parties this year. 
Shaving cream! I buy the Barbor brand cheep good stuff. 3 squirt lines per student and one  "reload" line at the halfway time. Cleanup: Student use wash cloths to wipe their hands and selves clean. The last group cleans the table with the same towels.

Free Paint. Only one paper. Must write name first. Don't forget to Swish, Wipe, and Blot. Cleanup: Paintings to the rack and refill water cups.

Play Dough! Each student gets one container of play dough. No mixing or sharing.  Cleanup: mush up all play dough crumbs and put back into container. 
Easy as 1, 2, 3. Every nine weeks I change the centers up, but I will usually leave painting because they love it so much. Make sure to rotate around the room to monitor. I explain the clean up directions as I go around the room. They will be more likely to remember the clean up directions if you give tell them each time they are at a center. If you give them all at the beginning they will typically forget or not pay attention because they are excited.

Side note: If a student has had to pull their card through the nine weeks and has ended up in time out, they will serve the time out time again at their party. DON! DON! DON!

Do you have good behavior rewards? What are they? 
What are some other quick and easy centers you could have at your party?


4

Free Choice Center

One of my favorite things about my new art room is the FREE CHOICE CENTER.  Many followers may recall my post I'm Finished, Now What!? That was the center at my last school. I have revamped this year with more ideas and choices. Thanks to Jessica at The Art of Education I decided to explain how I do "free choice".

I have these wonderful cubbies in my room that stretch along the whole wall.  So to distinguish where the actual free choice activities are, I taped off the area with yellow duct tape.  I also put a big sign on top.  Students are instructed to choose materials from above or inside the yellow area. 
When do I use free choice?
 - When a student finishes a project and there is still class time. - Sometimes as an activity with a sub. 
- When majority of the class is not present due to a school program during their art time. 

FREE CHOICE RULES
Must have teacher permission
Choose one activity at a time
Work at your seat
Put things away neatly
Only get 1 piece of free draw paper during your free choice time
Crayons, pencils, dry erase markers, and chalk only!

WHAT ARE MY CHOICES?
- Drawing books: kept in a green crate. I usually order drawing books, cut the pages out, put them into protective sleeves, and place them by category into plastic folders.

- Reading books: kept in a pink crate

- Free draw paper: copy paper


- Free drawing: students may get a drawing book and one piece of free draw paper to draw on the front and back. They can take it home with them that day or they may keep it in their table's folder to finish on another day.
I'm so proud of their ability to follow drawing directions! Both these photos were first graders.
- Dry erase papers: During the summer I put copy paper into page protectors and put duct tape at the top. Students get one dry erase paper, marker, and a SOCK to erase with. Used CLEAN socks are great for this. Plus, the kids think it's pretty cool too.
- Texture plates: I don't really understand the fascination with these, but okay. I encourage them to use the whole paper, draw a picture then color in the different areas with the textures, and make up animals to create the textures on.

-TANGOES: These are excellent. They are magnetic tangram pieces with booklets to show the kids how to construct the pictures. I also encourage then to make up their own pictures. I only have three of these and they are one of the first things chosen off the shelf. I purchased my set from Target.


Modeling Clay: I have tons of modeling clay that was just sitting in a box left from the last teacher. Never used. I had two kinds. One works better then the other. I had lots of colors so I put them into ziplock baggies. Students are instructed not to mix colors, not to make "bad" things, and to seal the bag closed when they are done. I told the students that if I noticed missing clay they would not have it as a choice anymore. So far no stealing... that I've noticed...
Love this little snail family.


I like this modeling clay the best because it doesn't stain your hands. I've used the clay since August and it shows no sign of drying out.
The other kind are typically in rectangular blocks and are not sectioned like these. They usually stain your hands. Thus, I don't use them.


Chalk Boards: I have a shelf of small and large chalk boards (see first picture of this post), white chalk, and sock erasers. I personally can't stand chalk boards, but my students love them.


My free draw self will change throughout the year depending on what deals I see in stores. I have also had puzzles, blocks, and legos. After Christmas break I'm going to add complete the picture sheets in page protectors so they may use dry erase markers.
I hope this helps with your Free Choice ideas.
5

Putting it into Perspective

The school day is now 45 minutes longer due to snow days. Instead of using the 35 minute extra art time for each class to continue to work on their current classwork, I've changed my perspective and decided to give each class a little challenge! 


2nd grade class #1 dove into perspective after watching a cool Reading Rainbow video on 1 point perspective. I borrowed an Elmo (document camera with projector) from their teacher to demo this lesson. . . I shouldn't have borrowed it because now I'm foaming at the mouth to have one. 


I copied off my own "Complete the Picture 1 Point Perspective Railroad Track" page. The picture had a horizon line, vanishing point, one diagonal line for the train track, one small telephone pole, and one large telephone pole. Students completed their pictures while I demoed on the Elmo. 
Supplies: "Complete the Picture page"
ruler, pencil, and eraser. 
Vocabulary:
Horizon line
Vertical, Diagonal, Curvy lines
Vanishing Point
Foreground, Middle ground, Background
Diagonal line
Construction lines
Awesome results!


2nd grade class #2 watched the same video, but this time I let them follow along with the artist that drew the 1 P.P. train track. Sorry no pics from that one. The students liked it so much I decided that we should try some shapes. 
So we drew our Horizon line, vanishing point, and four shapes (square, rectangle, triangle, and circle). I told them we were going to use the same technique with our shapes and they would follow along while I demoed.  Students connected points and curves of their shapes to the vanishing point. Once two shapes were done together, students caught on and I let them continue on. Some even added more shapes with some stencils from the Free Choice Shelf. 


2

Joan Miro Animals

Yet another lesson inspired by Deep Space Sparkle!
This lesson is awesome for 1st and 2nd grades! I believe it really brings them out of their "I can't draw" box and allows them to practice good coloring skills.

Materials: any size paper, black crayons, and colored crayons

Students looked at artist Joan Miro's painting Woman with three hairs surrounded by birds in the night and I asked them to tell me what they saw (Describe). "Shapes, Lines, Colors!" Of course many other funny and excited things were mentioned. 
We also discussed how it may be hard to see exactly what the picture is of. This is called Abstract. Even after hearing the name of the work, students were still baffled. 
The students were so excited when I told them we were going to create some Joan Miro Animals!!
I began by showing them how to draw an animal or two with shapes and lines. After the basic contour was drawn, I added lines to the bodies to make them look more like a work of art by Miro. Students liked guessing what it was I was drawing. This kept them on the edge of their seats.
Students were to draw their animal using either pencil or black crayon. (If students used pencil, they were to trace over it with a black crayon) I typically use black crayons so designs will have a more eye popping look. Pencil seems to get lost.
Students were given a teacher check before they could start with colored crayons (so I could collect the black crayons)
I asked students if they saw scribble scrabbles in Joan Miro's work. "Of course not, so let's do our best coloring." (I walk around the room giving lots of feed back on how well their coloring is. Positive reinforcement is always the best!)
The final results of this project were amazing.


My 2nd graders created Joan Miro People last year, but I knew they would love to draw animals. The modification for 2nd grade was to use markers on larger paper.


Back to Top