Showing posts with label Drawing. Show all posts
0

Relief Drawings


When I started my Art 1's on value we began with value scales using 5 different types of value: blending, stippling, hatching, cross-hatching,  and scribbling. I wanted them to see how light affects shadows and see how real value is created. So, I uncovered a lesson I hadn't taught since my student teaching year. It was extremely successful and so I decided to dust off it's cobwebs. You can find the link here on Blick's website. I only made a few modifications.

Materials:
2 - 9"x12" drawing paper
tape
stick glue
scissors
light source (we used our smart device flash lights)
1-12"x18" 80 wt drawing paper
pencils
kneaded erasers 

We began by discussing high lights and shadows, how they are created, and how we can replicate them. Then, I led students through a PowerPoint discussion on what a relief is and how the changes in value show us what is closer or farther away from us in a relief. Students were a little nervous when I told them we would be creating a relief and then using it to create a value drawing. Then I pulled out the paper and demonstrated how they could create a relief with it by manipulating the paper to make different forms. I stressed that they would have to draw all the forms they created. This stopped some students from going too over the top and encouraged others to challenge themselves. Students used one piece of 9"x12" paper as the base and the other to create the forms. Their goal was to create at least 5 different forms. This step took only one 90 minute class time. 


Once the reliefs were created I demonstrated how to use a light source to create interesting shadows. I set up a cart and used my iPhone flash light as a light source and had a student take a picture with the class iPad. You could also take the pics with a camera and use a lamp. I found that the iPhone flash light created the best variety of shadows. I explained how fill up the whole frame and position the light source to create an interesting image. 
Students with smart devices could take a picture themselves while telling me where to position the light source. I would show them 4 different angles for the light source so they could see what the shadows would do and they picked the best one. They could draw directly from their phone or I could print out the image for them. Students who didn't have smart devices used the class iPad and printed out their image. I don't have any windows or enough lights to set up around my room so this was my only option in order for everyone to have a different and unique composition. The students loved making these creative decisions. After the pictures were taken students sketched out their relief in their sketchbooks. This allowed great practice time and allowed me to over see their creative picture taking and print images.


The next day I explained how to begin the drawing by addressing proportion, space, and placement of objects. The drawing stage took two 90 minute class periods. I stress to my students to draw lightly and have a strong finished drawing before adding value.
After the drawing stage we were able to address the value. I demonstrated how to look for the darkest values first just like we did the value scales and then continue to lighten from there. We also discussed how some shadows have values that fade and others are solid. 
I could not be more proud of the results from this project. I believe it really helped students see the actual value changes in relation to light source and form. They truly do have a better understanding of light source and value changes. 


6

Pick & Draw

Talk about a great ice breaker! Thanks to Rich Davis creator of Pick & Draw I had a great activity for my new students during their first art class.

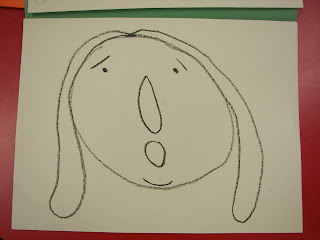
Pick & Draw is an awesome game  that is a fun one of a kind  drawing game.  It teaches students how to make crazy and creative cartoon faces. Which was exactly what I needed for my new students.

I didn't know their abilities or even what they had been exposed to from their last art teacher. Which, from what other teachers had told me, was not a lot.  So I decided to use this game not only as an Ice Breaker, but as an assessment pre-test.

Check out Pick & Draw for yourself to see what it's all about.  I used Pick & Draw during 3rd and 4th graders' first day.  It was a great way to end class after going over rules and procedures.

Here are the awesome results.


3

Art Test

   The end of the year was fast upon us. 1st grade had one more day of art class before the "Good Behavior Art Party" day. Should I have them watch a movie or free draw.... Neither.
   I decided to see what my little 1st graders had learned from the year. In 1st grade we begin to apply the "basics" to projects that reflect around the Elements and Principles. We concentrate on drawing with pencils, coloring like an artist, painting, and collages. So I decided to test them to see how much they had retained. Will they remember to draw lightly? Swish, wipe, and blot? Let's find out...
Students were told that this was a test. I wanted to see if they remembered elements, principles, procedures and processes we had worked on all year in class. 
Create a flower: Any kind. Real or imaginary. 
You have 3 choices of how to make it: Drawing and coloring with crayon, Collage with scissors and glue, or draw and paint. 
All students were given 9"x12" white paper. All materials they needed were out and ready. The rest was up to them. 
Tracing the drawing with a black crayon to make it "POP" when it is painted.

Some students made two types and wanted to turn in the best one. Here you can see paints and crayons out. 

Correct paint procedure setup!

When I asked this student where his sky would stop he said, "All the way to the ground SILLY!"

Me: "Why is this flower so much bigger?"
Student: "It's in the foreground!" 

This student went on to paint the rest of the sky blue and leave the clouds white. It made the cloud shapes more organic. 

One student creating a collage and another one coloring. Notice how her petals are in a stack. She stacked the papers together and cut them all at the same time. "Why did you do that?" I asked. "Because I wanted them all the same." she said. 

Many imaginary color choices!

This little girl pointed out to me that she let one color dry, painted something somewhere else, and then came back to paint beside the first color. She remembered that the colors may bleed together. 

Paint setup for two. You can tell that they did some good blotting on their paper towel.

I was very pleased with all the results. Only 2 students forgot a couple of things. I believe I will now give a test at the end of the year similar to this for all grades. It was a HUGE SUCCESS and the students loved showing me what they learned. One even told me that this should be on the TCAP! 


4

What color is your Dog?

I look forward to this all year because it peeks students' interest in Modern Art as well as gives me a look into their interests. 


To begin the lesson I introduced students to the artist and creator of Blue Dog, George Rodrigue with this great video from CBS on YouTube. 
The students were hooked. In a 3rd grader's eyes, nothing is cooler than a dog project.  After a little Q & A session I read the book, Why is Blue Dog Blue? by George Rodrigue.  This book really jump started some ideas! So to prepare for the painting students had to complete this sentence: "When I think of ______, I paint blue dog _______."


To begin, students followed along while I demonstrated how to draw Blue Dog. I really enjoy drawing lessons. I always try to use key Element of Art words to help guide students through the process. After the drawing lesson some students were disappointed in their drawing. They thought that since their drawing didn't look just like mine that it was no good. "On the contrary," I explained. "If everyone's drawing looked the same then our drawings would look pretty boring. What's fun and interesting about seeing the same thing?" The students began to understand and loosened up. Their personalities began to shine through as they continued to draw the background. 


Next class time, we discussed how to make our Blue Dog "POP"! George Rodrigue uses a bold black outline around Blue Dog to emphasize  the importance of the image. Plus is makes our dogs "POP"! We traced our drawing with black tempera cake paint. The tempera cakes allow us to have a better sharper outline. Plus, it dried very quickly and allowed us to continue to paint right away.


We then continued to paint Blue Dog with the tempera cakes. This step took two days. 
 

Students loved this project because it was a way to express themselves which made the students take their time and do their best. Students always do their best when it is a project that peaks their interests. 


This lesson was taken from Arts and Activities Magazine, April 2009 issue
What Color is your Dog? by June "Sam" Compton

Back to Top