Showing posts with label Crayon Resist. Show all posts
5

Watercolor Animal Weavings 4th grade Part I

I am so excited about this project! I have never done a watercolor weaving and really wanted to try it out with my forth graders. 
Objectives:
The Student Will draw two pictures exactly the same of a real or make believe animal using pencil and black crayon that fill 80% of the space.
TSW paint both pictures using watercolors with one picture painted using cool colors and the other painted using warm colors
TSW cut one painting into 1 1/2" strips, horizontally for the Weft
TSW fold the second paper in half "hot dog" style and cut 1 1/2" sections apart vertically for the Warp leaving an inch at the top and bottom. 
TSW will weave the Weft papers through the Warp papers to create a watercolor weaving. 


Here we go
Day 1: We got warmed up by drawing a few animals to get the students in the mood. I made folders with simple "How to draw Animals" sheets for each table. Students didn't have to use the sheets, but this did help with those who were "stuck". 

Some students even combined two animals! 
A Liophin!
Students drew the first drawing with pencil and then traced it with black crayon. The second paper was placed on top of the first so you could see through the paper to trace with black crayon once again. 
Viola! Two identical drawings!
 Day Two: Use watercolors to paint one picture with warm colors...
 and the other with cool!
I am so proud of the 4th grade drawings and I can pledge that I didn't touch 90% of them!! 
Stay tuned for Part II!
7

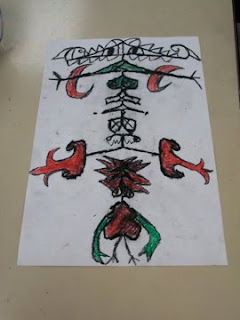
Name Aliens... Bugs... Whatever!

Such a huge success!
 I have called these designs bugs and aliens. Students prefer aliens because I began this project right after the movie Monsters vs. Aliens came out. I use to do this lesson as a one day filler lesson without the paint. But this year I decided to take it a little further.

Materials
12"x18" white 60 weight drawing paper, black oil pastels, pencils, crayons, liquid watercolor

We began by talking about two kinds of Balance: Symmetrical and Asymmetrical
I called on students to give me examples of shapes that were symmetrical and then asymmetrical. 

The first step was to fold your 12"x18" paper in half like a hot dog and then open it back up and turn the paper horizontally. 
"We want these Aliens big!" Therefore, students should write their name (with pencil) in cursive starting on the fold line and having their capital letter almost touch the top. (I always find that cursive brings the best results)
Once they have written their names with pencil, students will trace over their names with a black oil pastel. 
Next, fold the paper back in half like a hot dog and use a ruler to rub over the paper heavily. Please be sure not to rub too hard or the paper will tear. Students open their paper to see that the name has transfered. The transfer will be light so they will need to retrace the new side with the black oil pastel.   
Students may add new body parts and such to their Aliens, but the designs are symmetrical! What you add to one side must be added on the other!! 
Now, use crayons to add color to your Alien.
Once students have colored their Alien heavy and dark, the next step is to choose one color of Liquid watercolor paint.
( I pour them each a little of the color they want into a condiment cup and I add some water to make the paint last longer)


 Simply AWESOME! I didn't have one student that was not pleased by their Alien.


My Hands, Lines and Pattern


I love to start the 1st graders off with this little lesson I got out of the book Hooked on Art.
 We began by talking about the Elements of Art and how they are what artist use to make art. I believe line is the foundation of the elements, so I always start there. We discussed the 5 types of line with a little.... not really a song, but kinda, sorta a chant that the kids love and remember year after year. It goes a little like this: (complete with hand motions)
"Laying down line, Stand up line, Slash! Curvy curvy curvy, andddddd
a Zig and a Zag and a Zig Zig Zag!"
Thank you again Pam Hickman!
The kids love to sing the Zig zag part over and over when they work on line projects. 
Then we talk about the Principle Pattern! I usually find patterns with the students. I'll line them up by shirt colors or something and ask the others to guess the pattern. They eat that up!
Then comes the Project.

Materials: any size paper, black crayons, color crayons, and your hand!

Students begin by tracing their hands with a black crayon 5 times for the 5 types of line. They may overlap or trace all around.
Then, still using the black crayon they draw in the 5 types of line. They could use  one line to each hand or mix them up.
Finally, students use color crayons to make patterns.
I always tell them to color heavy and dark!
"Are you in Kindergarten?" I'll ask.
"No!" 
"Good, then I want to see 1st grade coloring!"


The results are awesome!!
2

Can You Find My Name?

2nd graders learned about the Abstract art of Wassily Kandinsky and created these awesome Abstracts! 
I like to start off the year with a few fun name projects. I thought of this lesson while creating a lesson about Abstract art for my 6th graders. We began by looking at Wasilly Kandinsky's painting Harmonie Tranquille. 
I asked students to describe to me what they see. "Lines, shapes, bugish things, colors!" and the list goes on. I asked them to talk some more about the lines and shapes to do a little recall from last year. Then we talked about how Kandinsky created Abstract paintings that didn't make since to anyone but him. 
So the students were super excited to create their own Abstracts!
Materials: any sized watercolor paper, black oil pastels or crayons, watercolor paint. 
Vocabulary: 
Line, Shape, Abstract Art, and Wassily Kandinsky

Students begin by ABSTRACTING their names. The letters of their name are written small, BIG, sideways, upside-down, and all around using a black oil pastel.
Next students added the 5 kinds of line: Vertical (stand-up line), Horizontal (laying down line), Diagonal (slash), Curvy, and Zig-zag.
Then they add a few of their favorite Geometric Shapes.
Finally, students paint their Abstracts with watercolors. Students could paint inside their lines or all over. As it is an Abstract! 

The students loved the freedom of this project and it allowed all students to come out of their "I can't draw" shell!
  
0

Fall Leaves Crayon Resist

SUPPLIES NEEDED
Warm color crayons (yellow, red, and orange) and brown
hands
blue liquid watercolor paint

I love to start younger grades off with easy drawing projects. It is also important for students to work on their fine motor skills and tracing is a great way to do so. I begin this lesson by reviewing previous knowledge on the color wheel. We then discuss Warm and Cool colors. Talk about the changing of the leaves. If it's a nice fall day, maybe go out side and bring in some leaves. Then we talk about the organic shape of the leaves. 

DEMO
How to draw a simple leaf by tracing your hand with fingers together or apart. If fingers are apart then trace across to the next finger. 
Trace enough leaves to cover most of the paper.
Show how to color heavy and dark with your crayon so we can see the beautiful colors and not the white of the paper. They may color each leaf a different warm color or use all colors on all the leaves. 

Demo how to blend with the crayons. I have students shake out their hands when they get tired.  
Now take the brown crayon and make slash lines for the vanes of the leaves.
Now use blue liquid watercolor and show students how the crayons don't like the paint so they will not let the paint cover them... Crayons resist paint!!
Cover the whole paper so no more white is showing! 

MAYBE
discuss way we use Blue paint.... why not a warm color?
Contrast? Difference? We can see the leaves better!!
Back to Top