0

I'M FINISHED!! Now what?

How many times have you heard, "I'm Finished!"? We all know that shrieking noise that sounds when a student has finished a project. Usually the louder ones are those that complete their assignment quickly. I have the worst trouble with the "quickies" early in the year. Some of my students love to finish projects fast because of what they get to do when they are done. 
"FREE CHOICE ART!" 
Free Choice Art in my room is only for students who have finished their work completely and have not rushed through their work. 


Free Choice Art Rules
1. Finished work check by teacher (I provide constructive criticism at this point and inform the student if they can improve upon some objectives. This has really cut down on my early finishers)
2. One free choice activity at a time
3. Only 1 drawing paper or 1 drawing activity paper
4. You may use your pencil and crayons only


All Free Choice activities are on a shelf in the corner of my room. This picture is from last year and doesn't include some of the choices I now have.
Choices include:

  • Free Draw with one piece of paper, pencil, and crayons
  • Stencils
  • Texture Rubbings
  • Rulers
  • Drawing books (NO TRACING)
  • Reading books
  • Puzzles 
  • Drawing Activity Pages
One of my rules that I never waiver from is the 1 free draw or 1 drawing activity page. This cuts down on waste and forces the student to think about what they are doing. If they only have one paper they are less likely to waste their time. 

I see some of the most amazing things from my free choice centers. Here is a "Wild Thing" from a 5th grader

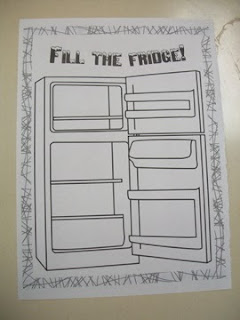
My favorite Free Choice Art would have to be the Drawing Activity pages. I found an awesome book from Books A Million on sale that had 1,000 pages of drawing activities and ideas. I recommend this book to all educators to use for student Free Choice Time. Here are some examples of pages. Enjoy!
  
6

"That Little Art Teacher"

Hello all!
   While surfing the internet one day I ran across the blog Mrs. Art Teacher! Sound familiar? Yes I know the name of my blog used to be Ms. Art Teacher... I love the other Mrs. Art Teacher's blog! I noticed that she had been at this blogging thing a lot longer than I have and I felt bad for having a name so similar. 
   Thus, I have decided to change my blog name to "That Little Art Teacher". Why that name you may ask? When I meet new people in my profession and ,they can't remember my name, they almost always refer to me as "That Little Art Teacher". Not that I'm tiny or anything... far from it... but I'm short and I still look like a teenager. Not a bad thing, I know, but the title seems to stick around. I guess I'll stick it on my blog! 
22

Kindergarten: Teaching with Art Centers

 So what class scared me the most when I began teaching... Kindergarten!!
I just didn't see how I was going to get 20+ Kinders to focus for 50 minutes!! But, the art teacher whom I had replaced left me a few ideas. She used ART CENTERS! I had heard of CENTERS in the regular classrooms but had not thought about them in the art room. After some research I discovered that Centers make Kindergarten so much easier to teach. After all, it's how they are taught in their own classroom. Small group learning is the key. Here's how I do it.
  • 3 groups of 6 to 7 students (depends on class size) 
  • Each Art Center is 15 minutes long (this leaves 5 minute cleanup at the end)
  • Students use "Table Talk Voices"
  • I use a bell to ring 2x for center clean up and sitting quietly. Then I ring the bell 1x when I see everyone is ready, to change centers. Repetition is key to nailing the clean up and center change.
CENTER 1: PLAY-DOUGH

Play-Dough is great for fine motor skills, sculpture, and responsibility. 
Most days are free choice, but others we learn how to make forms and other fun things. I don't always give students tools. I like for them to use their hands. 
Keep play dough in zipper zip lock bags and add a little water each week to make play-dough last! Store all bags of dough in a plastic container.
Center 1 Rules: 
GermX before you play!
No eating, throwing, or sharing your playdough
1 color
Clean up by mushing up your crumbs and putting all play dough into your bag, hug bag, and zip. (this is to get the air out of the bag) 

CENTER 2: BLOCKS
Students love to build with blocks. I love to watch them working together as a team. Blocks are kept in 3 plastic shoe box sized containers. Best blocks are the soft foam blocks because there is no noise when they fall. I found that a pack of 100 blocks is perfect for a group size of 6 to 7. I hope to purchase a rug so students may do this center on the floor. 

Centers #2 Rules:  Sit on your bottom
Get 1 block out at a time
Share when you are not using a block
Build no higher than your head

CENTER 3: PROJECT CENTER
Drawing, painting, collage and more! This is the center where I spend most of the time. All my art lessons are conducted here. 15 minutes is the perfect amount of time to teach short attention spans. This project center involves a short instruction that is broken down into the simplest of directions. You may even have students make the project step-by-step along with you. Also, this center is always closest to the sink for washing hands. My project table may even be 2 tables next to each other if it is a project that involves a lot of materials or more space is needed.  I sometimes use a small dry erase board to hold examples and demo. If we don't have time to finish a project then we will continue the next week. 
As you can see, it is easy to fit 3 baskets of any material on my long rectangle tables. I may even use 2 tables next to each other if more space is needed like this picture >
This center is by far the favorite especially when paint is involved. 


More about Art Centers
  • Depends on class time
  • Try simple centers the first time so students will get in the groove and learn the center rules. 
  • Each group always starts class at the same center and learns through repetition what center to go to next. After week 3, most have this down. 
  • Use signals for cleanup and when to change tables. (I use a bell)
  • I choose tables that are cleaned up first and sitting quietly to line up at the end. I also choose an art helper from each table to put supplies away. 
  • Two centers will need to be simple do-it-yourself if you will be spending most of your time at the third center. Never turn your back to the other 2 centers. Always keep vigilance. Walk around to check up on them when project table is working well on their own.
The centers above were the 3 main ones I use, but here are
MORE ART CENTERS
  • printing
  • collage
  • puzzles
  • reading
  • games
  • chalk boards
  • art toys
  • origami 
  • etc....
10

GLUE! What do you stick with?

Glue is a huge must have material in the art room. Have you had love hate relationships with glue?

 I love the old stand by of the Elmer's liquid School Glue for 1st - 8th grades
My students learn to use "Baby Dots" and not "Big Daddy Dots"
If it gets on our hands we rub them together and turn it to "Dust"
I buy the glue gallons for refills.
Downside: Messy and clogs 
I teach students to get rid of their "glue boogers" when they close their glue. hahaha


I also use Elmer's Stick glue for all grades. Student's learn that we just want to see "A Peak" of the glue when we roll it up. It's also a good tool to teach Right and Left. 
Downside: wasteful ( you can't keep your eye on every child to see that they only use a peak of glue)
I buy more stick glue than anything throughout the year.


WORST GLUE! 
I don't think they make it anymore thank goodness! 
Dick Blick stick glue! I don't usually put down Blick's materials, but this one was awful! It dried out after the first use!! even when used and closed correctly! 

Now I want to know.... What are your thoughts on BEST and WORST glues?
0

Gingerbread Houses 2

I wanted to revise a wonderful lesson because, after all, do we ever teach a lesson the same? I hardly ever do. I'm still a "new" teacher, so I am always revising. Here are a few new steps and pictures from a favorite lesson.
(I will add more pics once I finally go back to work from all these snow days)
This is my example that is kept in view on the board. I am not against showing examples. I instruct that they do not have to copy, but they may get some inspiration. 

SUPPLIES NEEDED
12"x18" white paper
1- 9"x12" piece brown construction paper cut in half for each student
(house and roof)
1 green scrap paper for tree tops
many other colors of construction paper 
 (I let my kids dig through the "scrap box" for this project.)
Elmer's glue 
pencil
construction paper crayons

DISCUSS
What collage is and show an example
We discuss that to create a collage we will have to draw and cut out a lot of shapes. I draw different shapes on the board and they students shout out what they are as I go. I pretend that I am trying to stump them! I go back over geometric, organic, and freeform shapes.
This would be a good time to read a great Gingerbread type story.

DEMO
Before I demo anything with this project I teach gluing!!
Gluing!! I teach my students to use "Baby dots" spread apart and not right on the edge.
I show what to do if glue gets on your hands or drips out. If it gets on your hands, rub them together and turn it to dust! (They love turning it to dust, but not enough to do it on purpose because their hands get real hot when they rub) If glue leaks on the paper, use a paper towel to wipe away.
I teach that when you create a collage you need to glue down the background (what is in the back) 1st!

HOW TO MAKE THE GINGERBREAD HOUSE
(Steps 1 - 2 are demoed on the board and done together)
1. use your two brown pieces of construction paper to make the house
Glue down one for the house
Cut a triangle out of the other one for the roof, glue and put above the house
I tell students that their roof can look different from mine but they have to make it out of the other piece of brown paper.
2. Use the scraps you have left from the brown and make two rectangles for the tree trunks.
3. Use the green scrap piece and draw your tree tops. Tree tops could be triangles or organic shapes.
4. Students may now create the rest of the house themselves. Remember to DRAW, CUT, GLUE!!
(they have already done this process along with me and understand why it is easier)
4. Go through the scrap box and find papers for: windows, doors, people, trees, decorations, etc.
I call one quite table at a time to go to the box and once every table has scraps they may go get another as they need it. :)
5. Draw, cut, glue what's on the house
6. Draw, cut, glue what's beside the house
7. Finally, use construction paper crayons to complete your collage

0

Again.... I am thrilled and honored

I set out to create this blog to inspire and help others just as I had been when I stumbled across an Art Education blog for the first time. 

I am honored to be recognized by THE E-ADVISOR BLOG for being one of the 

I never even imagined that my blog would become what it is, and I am so glad that I am fulfilling my blogging goal. 
Thank you to my followers and thank you E-Advisor Blog!
:)

Please enjoy our school Christmas tree. 2nd, 3rd, 5th, and 6th graders created all the ornaments!!

Back to Top