Still Life with 6th grade

Before embarking on a Still Life drawing, I make sure students understand Line, Shape, Space, and Color. I also teach how to draw by the way I know best... the way that I know. (i.e. my technique) I will not teach a technique until I understand it's ins and outs and I can teach it comfortably.


Materials: 12"x18" paper, pencil, liquid tempera paint, brushes size 12 & 14, and a round paint palette for each student, and foil to cover palettes
After going over Line, Shape, Space, and Color, we critique various still life paintings and drawings. I ask students how the artist would use certain lines, what shape would we start with to draw an apple, where are the grapes, and how did the artist use space?
I hammer these thoughts into their heads. Because when you draw a still life, you should ask yourself  these questions. 
What shape is this?
What line could I use to draw this?
How big is this?
Is this next to that?
Is it in the Foreground, Middle ground, Background?


I then show them I how would draw a still life step by step. However, I tell them that my steps beginning to end do not have to be theirs. I just want them to see how I am questioning myself as I draw things out. 
My #1 rule in drawing anything: DRAW LIGHTLY! Until you commit yourself.


To start students chose one of 4 still life paintings that I displayed on the overhead to draw from. This way I can get some verity and not everyone is drawing the same thing. 
Begin by thinking about Line, Shape, and Space as you are drawing.
This step took 1 & 1/2 5o minute class time.
Sorry I don't have a picture of the first step.
I demoed how I would begin to paint
The second step is to paint. Students have already completed a lesson on color theory and mixing their own color wheels. I give students only Red, Yellow, Blue, Black, and White.
I am so proud of their color mixing!
I let them choose the color of their tables and wall colors for their paintings.
The final step is to add shadows and highlights.


No Cookie Cutter Art Projects

I support the "No Cookie-Cutter" Art Projects movement.
Thanks to Erica at Art Project Girl
I am a step by step teacher, but I will not use cut out sheets for every single project, I will not draw everything out for the child that doesn't understand. Instead I will encourage and show the student that if you "Make a Mistake, Make It Great" -  Adventures of an Art Teacher
Please note that I do not consider teachers that may use "Cooke Cutter" projects to be bad teachers. All art teachers are wonderful in their own special way. We all have our own styles. It is just not my preference. 
7

Name Aliens... Bugs... Whatever!

Such a huge success!
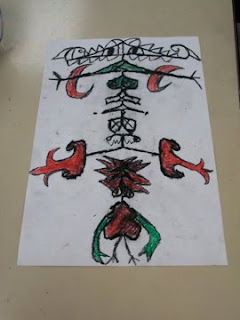
 I have called these designs bugs and aliens. Students prefer aliens because I began this project right after the movie Monsters vs. Aliens came out. I use to do this lesson as a one day filler lesson without the paint. But this year I decided to take it a little further.

Materials
12"x18" white 60 weight drawing paper, black oil pastels, pencils, crayons, liquid watercolor

We began by talking about two kinds of Balance: Symmetrical and Asymmetrical
I called on students to give me examples of shapes that were symmetrical and then asymmetrical. 

The first step was to fold your 12"x18" paper in half like a hot dog and then open it back up and turn the paper horizontally. 
"We want these Aliens big!" Therefore, students should write their name (with pencil) in cursive starting on the fold line and having their capital letter almost touch the top. (I always find that cursive brings the best results)
Once they have written their names with pencil, students will trace over their names with a black oil pastel. 
Next, fold the paper back in half like a hot dog and use a ruler to rub over the paper heavily. Please be sure not to rub too hard or the paper will tear. Students open their paper to see that the name has transfered. The transfer will be light so they will need to retrace the new side with the black oil pastel.   
Students may add new body parts and such to their Aliens, but the designs are symmetrical! What you add to one side must be added on the other!! 
Now, use crayons to add color to your Alien.
Once students have colored their Alien heavy and dark, the next step is to choose one color of Liquid watercolor paint.
( I pour them each a little of the color they want into a condiment cup and I add some water to make the paint last longer)


 Simply AWESOME! I didn't have one student that was not pleased by their Alien.


2

Joan Miro Animals

Yet another lesson inspired by Deep Space Sparkle!
This lesson is awesome for 1st and 2nd grades! I believe it really brings them out of their "I can't draw" box and allows them to practice good coloring skills.

Materials: any size paper, black crayons, and colored crayons

Students looked at artist Joan Miro's painting Woman with three hairs surrounded by birds in the night and I asked them to tell me what they saw (Describe). "Shapes, Lines, Colors!" Of course many other funny and excited things were mentioned. 
We also discussed how it may be hard to see exactly what the picture is of. This is called Abstract. Even after hearing the name of the work, students were still baffled. 
The students were so excited when I told them we were going to create some Joan Miro Animals!!
I began by showing them how to draw an animal or two with shapes and lines. After the basic contour was drawn, I added lines to the bodies to make them look more like a work of art by Miro. Students liked guessing what it was I was drawing. This kept them on the edge of their seats.
Students were to draw their animal using either pencil or black crayon. (If students used pencil, they were to trace over it with a black crayon) I typically use black crayons so designs will have a more eye popping look. Pencil seems to get lost.
Students were given a teacher check before they could start with colored crayons (so I could collect the black crayons)
I asked students if they saw scribble scrabbles in Joan Miro's work. "Of course not, so let's do our best coloring." (I walk around the room giving lots of feed back on how well their coloring is. Positive reinforcement is always the best!)
The final results of this project were amazing.


My 2nd graders created Joan Miro People last year, but I knew they would love to draw animals. The modification for 2nd grade was to use markers on larger paper.


2

Falling Names

The inspiration for this lesson came from Deep Space Sparkle's Name Line Drawing
It's another name design for the beginning of the year. I like this lesson because it puts a little twist to your typical line design. I wanted the names to look like they were falling. Well, what better way then with some dynamic lines! 

Materials: 12" x 18" paper, Precut letters A - Z(I used 3" letters) one set for each of your tables, permanent markers, colored washable markers

We first studied Line and the 5 types of lines. Horizontal, Vertical, Diagonal, Curvy, and Zig-zag.
Students were to trace the letters of their name with permanent markers starting with the first letter of their name at the bottom of the paper and working their way up.
*TIP* We opened our portfolios under our paper for a nice working mat so that the marker would not bleed through.
They could overlap their letters by placing a second letter on top of the first, trace, stop when you hit the first letter, jump it and continue to trace the 2nd letter. The students really enjoyed that!
Next, students created the illusion of letters falling into turmoil by drawing the 5 types of line with the permanent marker.
I ask them to raise their hand for a teacher check before they move on to the colored markers. This way I can take up the permanent marker so it will not accidently end up in a marker box!!!
Finally, students may color designs inside their letters. 
This lesson took two 50 minute classes.
More pics to come. 

0

Oh Wow!!

How crazy this first month of school has been. I feel like it is all a blur!! It is crazy how tired I am. Everyone told me my first year energy would putter out... well, year 3 and it's going fast! 
I wanted to give you a sneak peak and an inside look at the goings on in the art room this month. The followup lessons on these sneak peaks will be coming soon!!


My school wedding shower!
(no followup on this, but it was a big part of the start of school)
Symmetrical Name Aliens 5th grade
Joan Miro Animals 1st & 2nd grade
Piet Mondrian Animals 3rd grade
6th grade Still Life Paintings
Fall Festival Fundraiser (Clay Pinch Pots)
6th grade Abstracts
Stay tuned for the finished products!

My Hands, Lines and Pattern


I love to start the 1st graders off with this little lesson I got out of the book Hooked on Art.
 We began by talking about the Elements of Art and how they are what artist use to make art. I believe line is the foundation of the elements, so I always start there. We discussed the 5 types of line with a little.... not really a song, but kinda, sorta a chant that the kids love and remember year after year. It goes a little like this: (complete with hand motions)
"Laying down line, Stand up line, Slash! Curvy curvy curvy, andddddd
a Zig and a Zag and a Zig Zig Zag!"
Thank you again Pam Hickman!
The kids love to sing the Zig zag part over and over when they work on line projects. 
Then we talk about the Principle Pattern! I usually find patterns with the students. I'll line them up by shirt colors or something and ask the others to guess the pattern. They eat that up!
Then comes the Project.

Materials: any size paper, black crayons, color crayons, and your hand!

Students begin by tracing their hands with a black crayon 5 times for the 5 types of line. They may overlap or trace all around.
Then, still using the black crayon they draw in the 5 types of line. They could use  one line to each hand or mix them up.
Finally, students use color crayons to make patterns.
I always tell them to color heavy and dark!
"Are you in Kindergarten?" I'll ask.
"No!" 
"Good, then I want to see 1st grade coloring!"


The results are awesome!!
0

Rethinking Special Education

   Recently the art education blog Art with Miss Rachel has inspired me with an idea. 
   First, let me start with how this idea came to be. My schedule is nuts, and it changes every 9 weeks. Not necessarily with different classes of students, but with classes meeting at new times. I work at a PreK - 8th grade school. However, due to other schedules, I do not teach 7th or 8th grade (sad face). Because of this, I have some "open" spaces in my schedule. By law in our state , a teacher can not have more than one planning period a day. So my principal has me assisting in other class rooms. I love this!! Believe it or not, I enjoy going into other rooms to help. I get to watch other wonderful teachers teach and get to see how other classrooms are run. It actually makes me feel more empowered to teach my subject when I go back to my room. 
   So how does this help me rethink special ed? Because what if one of those "open" spots in my schedule was for our special ed class? I see these wonderful students every week when a few at a time come with a regular ed class for inclusion. Unfortunately, the classes they come with tend to be large classes. The special ed students are doing well, but I can't always spend the time with them that they deserve. I feel like I have to leave their assistant to do most of the explaining if they have a question because I'm teaching this now class of 26! 
   I first went to the Special Education teacher who is a good friend of mine. She loved the idea of having a class just for them! I told her I could design lessons based around their needs and skill level. I could also help them work on fine motor skills. Because of Art with Miss Rachel I have been inspired by so many lessons to do with these wonderful students. The students could even be doing different activities much like art centers. I have sent an email to my principals and I am anxious to see how this will play out. If this was able to happen, I do believe that these students would gain a better appreciation for art and also gain and improve upon many skills that they will need in their daily lives. Thank you Miss Rachel!
2

Can You Find My Name?

2nd graders learned about the Abstract art of Wassily Kandinsky and created these awesome Abstracts! 
I like to start off the year with a few fun name projects. I thought of this lesson while creating a lesson about Abstract art for my 6th graders. We began by looking at Wasilly Kandinsky's painting Harmonie Tranquille. 
I asked students to describe to me what they see. "Lines, shapes, bugish things, colors!" and the list goes on. I asked them to talk some more about the lines and shapes to do a little recall from last year. Then we talked about how Kandinsky created Abstract paintings that didn't make since to anyone but him. 
So the students were super excited to create their own Abstracts!
Materials: any sized watercolor paper, black oil pastels or crayons, watercolor paint. 
Vocabulary: 
Line, Shape, Abstract Art, and Wassily Kandinsky

Students begin by ABSTRACTING their names. The letters of their name are written small, BIG, sideways, upside-down, and all around using a black oil pastel.
Next students added the 5 kinds of line: Vertical (stand-up line), Horizontal (laying down line), Diagonal (slash), Curvy, and Zig-zag.
Then they add a few of their favorite Geometric Shapes.
Finally, students paint their Abstracts with watercolors. Students could paint inside their lines or all over. As it is an Abstract! 

The students loved the freedom of this project and it allowed all students to come out of their "I can't draw" shell!
  
Back to Top